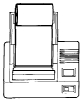
2/ Setting Up the TP-10 Printer
When you decide where and how to set up the Printer, remember the following:
-
Avoid plugging the Printer into the same outlet as equipment which generates electrical noise such as an air conditioner.
-
Choose a site that is not exposed to direct sunlight. Avoid dusty places and locations subject to temperature and/or humidity extremes.
-
Place the Printer on a sturdy work surface.
Connecting the TP-10 to the MC-10
-
Turn the power off on both the TP-10 and the MC-10 or Color Computer.
-
Connect one end of the 4-pin DIN to 4-pin DIN cable (26-3020) to the connection on the rear of the Printer.
-
Connect the other end of the cable to the serial connector on the Computer.
Connecting the Power
-
Be sure that the Power switch is off.
-
Plug the TP-10 into a grounded AC outlet or approved power strip, such as the Line Filter (26-1451).
Power-up Sequence
-
Turn on the MC-10’s power.
-
Turn on the TP-10’s power.
Note: When turning the system off, reverse the above order.
Also note that when you’re going to CSAVE a program with the MC-10, or RESET the MC-10, turn the TP-10’s power off. Otherwise random characters may be printed.
Paper Handling
Notes for Paper Feeding
- It is very important that the paper enters straight into the TP- 10 and that the paper loading operation is performed correctly. Otherwise, paper janmîing may occur.
 |
 |
- If paper jam occurs during paper loading, just stop pressing the PAPER FEED key and pull the paper out slowly. Be careful not to tear the paper because taking a torn off piece of paper out of the Printer requires disassembling the Printer.
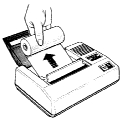
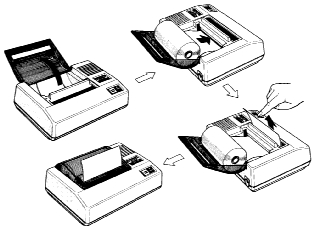
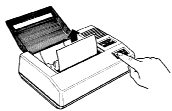
Loading the Paper
-
Open the cover.
-
With scissors, cut the end of the paper off square with the paper’s edge.
-
Insert the end of the paper into the slot as far as it will go. Note that the heat sensitive surface is on the outside of the roll. This side should face toward the print head.
-
Turn the power on.
-
Press the PAPER FEED key to get the paper through the slot and around the platen.
-
Close the cover.
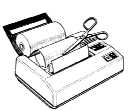
Cutting the Paper
- Press the PAPER FEED key to advance the paper.
- Grip the center edge of the paper and pull it as shown below.

Removing the Roll of Paper
- Cut the paper at the roll side and remove the roll.
- Press the PAPER FEED key to remove the paper caught in the platen.
| Do not pull the paper from the roll side: this action may damage the printer mechanism. | 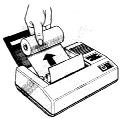 |
The Printer prints on thermal sensitive paper only. Obtain replacement rolls from your local Radio Shack store. Ask for catalog number 26-1332.
Note: Since the paper is heat sensitive, take care when you store or handle it to prevent:
- Exposure to temperatures over 50 degrees C (122 degrees F).
- Contact with alcohol, thinners, benzene or other liquids.
- Exposure to ultraviolet light rays, including sunlight.
Self-Test
The TP-10 has a built-in self-test feature which lets you check the printing quality and general Printer operation before you connect the Printer to your MC-10 or Color Computer. The self-test includes only alphanumeric characters.
Note: Be sure to disconnect the 4-pin DIN to 4-pin DIN cable from the Printer; otherwise, the self-test will not work.
- Turn the power off.
- While pressing the PAPER FEED key, turn the power on.
- The Printer will begin printing all the characters repeatedly.
- To stop the self-test, turn the power off.